Substrate is basically the food your mushrooms grow on. Get it wrong and you'll either end up with a tub full of trichoderma or a bone-dry block that never pins. Get it right and the mycelium tears through it like it's been starved for weeks. which, in a way, it has been sitting in that grain jar.
I've tried just about every substrate recipe going over the past couple of years, and I keep coming back to three or four that consistently work. This guide covers the main ones, how to prepare them, and which species they suit best. If you're setting up your first monotub, this is the bit you need to nail before anything else.
Why Substrate Matters
Mushrooms aren't plants. they don't photosynthesise. They get all their nutrition by breaking down organic material, and the substrate is that material. Different species have evolved to decompose different things: some prefer wood, others like straw, and a few do best on composted manure. Using the wrong substrate for your species is a bit like feeding a cat nothing but lettuce. it might survive, but it won't thrive.
The substrate also controls moisture levels, provides physical structure for the mycelium to colonise, and plays a massive role in your final yield. A well-prepared substrate at proper field capacity can be the difference between a single weedy flush and three absolutely belting ones. I learnt this the hard way when I spent months blaming my spawn for poor yields, only to realise my substrate was consistently too dry.
CVG: The All-Rounder
CVG stands for coco coir, vermiculite, and gypsum. It's the most popular bulk substrate recipe in home mushroom growing, and for good reason. it's cheap, it's dead easy to prepare, and it works for the vast majority of gourmet species. If you're not sure what substrate to use, start here.
Here's my go-to CVG recipe for a standard 60-litre monotub:
- 650g compressed coco coir. That's one standard brick from a garden centre or reptile shop. Make sure it's pure coco coir with no added fertilisers or trichoderma (yes, some garden brands add trich on purpose as a "beneficial fungus". avoid those like the plague).
- 2 litres vermiculite. Coarse grade, not fine. Vermiculite holds moisture and creates air pockets in the substrate. You can get big bags from garden centres or eBay for a few quid.
- 120g gypsum. That's roughly one cup. Gypsum (calcium sulphate) provides calcium and sulphur, buffers pH, and prevents the substrate from clumping together. You can find it in brewing supply shops or online. Some people skip it. the substrate will still work, but gypsum genuinely improves structure and I've noticed slightly better yields with it.
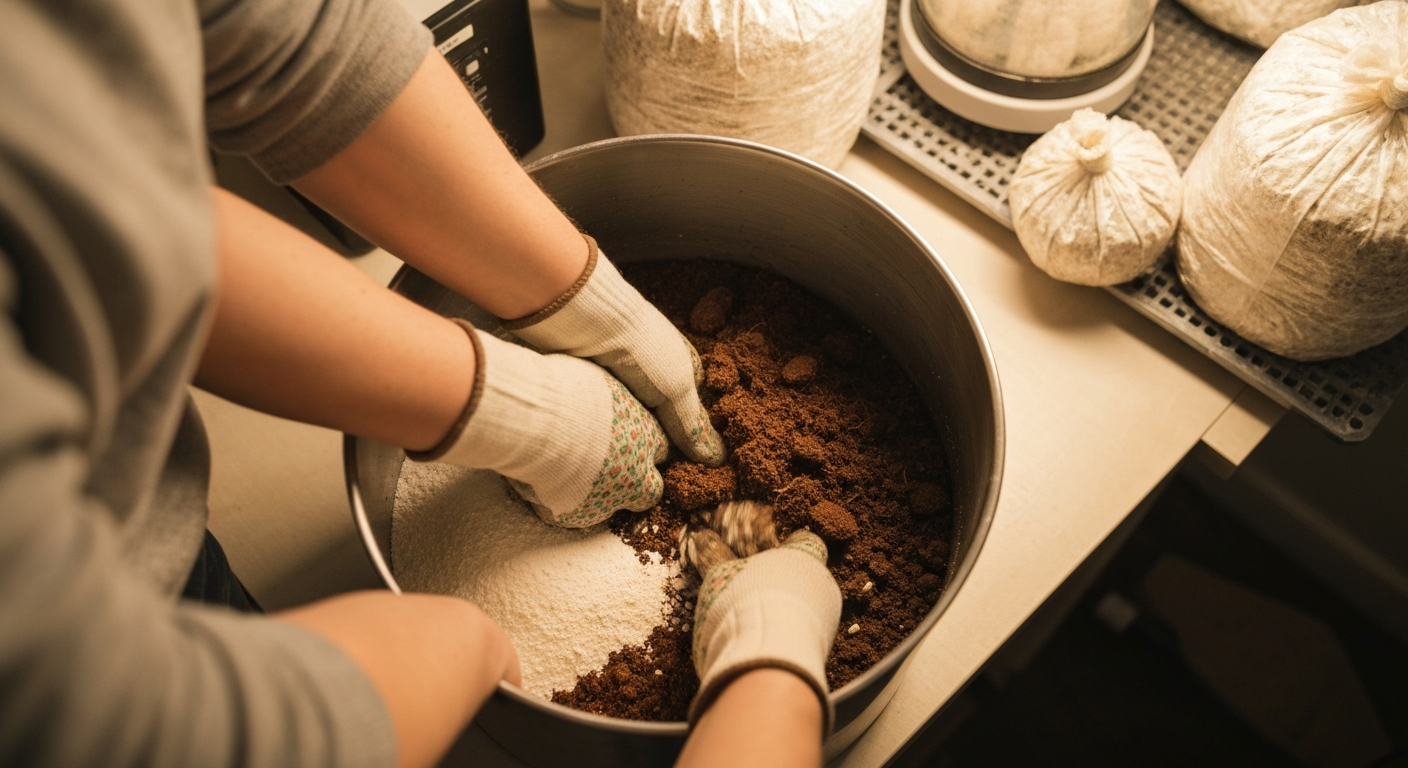
To prepare it, I use what's called the "bucket tek." Break the coir brick into a clean 20-litre bucket, add the vermiculite and gypsum on top, then pour over about 3.5-4 litres of boiling water. Pop the lid on and leave it for at least an hour. I usually do it the night before and let it sit overnight. The boiling water simultaneously rehydrates and pasteurises the mix. When you come back to it, break it all apart with clean hands and check field capacity (more on that below).
CVG works brilliantly for oysters, king oysters, lion's mane, and most other wood-loving gourmet species when used in combination with grain spawn. It's not particularly nutritious on its own. the grain spawn provides the real nutrition. but that's actually an advantage. Low-nutrient substrates are far more resistant to contamination than rich ones, because there's less food for competing moulds.
Straw Substrate
Straw is cheap, widely available, and absolutely brilliant for oyster mushrooms in particular. If you're growing oysters on any sort of scale. even just a few bags at a time. straw is probably your best bet. I've been using it for pink and blue oysters for ages and the yields are consistently excellent.
The main consideration with straw is chopping it down to size. Full-length straw is a nightmare to work with. it doesn't pack well, it's hard to hydrate evenly, and colonisation is slow because the pieces are so long. You want pieces roughly 5-10cm long. I use a garden shredder for big batches, but for smaller amounts a pair of scissors and twenty minutes of tedious cutting does the job. Some people run a strimmer inside a bin full of straw, which is noisy but effective.
Once chopped, you need to pasteurise it. Straw harbours all sorts of competing organisms. bacteria, wild moulds, yeasts. and you'll get contamination almost every time if you skip this step. The most common methods:
- Hot water pasteurisation: Submerge the chopped straw in water at 65-82°C for 60-90 minutes. I use a large stock pot on the hob with a thermometer clipped to the side. Keep the temperature in that range. too hot and you'll sterilise it (which actually makes it more vulnerable to recontamination), too cool and you won't kill enough competitors.
- Cold water lime bath: Soak chopped straw in cold water with hydrated lime (calcium hydroxide) at a rate of about 15g per litre for 12-24 hours. This raises the pH high enough to kill most contaminants. Drain, let it drip dry briefly, and it's ready. I use this method in summer when I can't be bothered standing over a hot pot.
After pasteurisation, drain the straw thoroughly and let it cool to below 27°C before mixing with spawn. For straw, I typically use a 1:3 spawn-to-substrate ratio and pack it into grow bags or 5-gallon buckets with holes drilled in the sides.
Hardwood Sawdust
Hardwood sawdust (usually supplemented with wheat bran) is the substrate of choice for shiitake, lion's mane, maitake, and other wood-loving species that prefer a denser, more nutritious medium. It's also what most commercial growers use. If you've ever bought a mushroom growing kit, the block inside was almost certainly hardwood sawdust.
The standard recipe is straightforward:
- 5 cups hardwood sawdust or hardwood fuel pellets. Oak, beech, or alder are best. Hardwood fuel pellets from a wood stove supplier are brilliant because they're already dried and compressed. just soak them in water and they expand into perfect sawdust. Dead cheap too, about a fiver for a massive bag. Avoid softwoods like pine or cedar. the natural resins in them are antimicrobial and will inhibit mycelium growth.
- 1.25 cups wheat bran. This is the supplementation that provides extra nitrogen and nutrition. You can buy wheat bran from health food shops or horse feed suppliers. Some growers use oat bran or soy hull pellets instead.
- Enough water to reach 60-65% moisture content. Roughly 1.4 litres per kilo of dry mix. If using fuel pellets, they'll absorb the water as they expand.
The critical thing with supplemented hardwood is that it must be sterilised, not just pasteurised. The added bran makes it nutritious enough that competing moulds will absolutely hammer it if you only pasteurise. You need a pressure cooker running at 15 PSI for 2.5 hours minimum. Pack the mix into autoclavable bags (or mason jars) before sterilising. This is more involved than CVG or straw, which is why I recommend beginners start with those and move to supplemented sawdust once they've got their sterile technique down. For more on sterile technique, check the grain spawn preparation guide.
Manure-Based Substrates
Right, let's talk about poo. Manure-based substrates are used for a smaller range of species. primarily button mushrooms (Agaricus bisporus), almond agaricus, and a few others that have evolved to decompose animal dung. If you're growing oysters or lion's mane, you don't need manure. But if you want to try your hand at buttons or portobellos, here's what you need to know.
The classic manure substrate is a mix of:
- Horse manure. Well-aged, at least a few months old. Fresh manure is too hot (high in ammonia) and will kill your spawn. Aged manure should smell earthy, not sharp or ammoniac. If you don't keep horses, local stables will usually give it away free. they've got more of it than they know what to do with.
- Straw. Chopped, as a bulking agent. Typically mixed at roughly 50:50 with the manure by volume.
- Gypsum. About 5% by dry weight. Same role as in CVG. improves structure and provides minerals.
Manure substrate needs proper composting before use. This isn't just chucking it in a pile. it's a controlled process. You'll want to mix everything together, wet it to about 70% moisture, and turn the pile every couple of days for 2-3 weeks. The internal temperature should reach 60-70°C during composting, which kills pathogens and breaks down the material into something the mushroom mycelium can actually colonise efficiently.
After composting, the substrate needs pasteurisation at 60-65°C for several hours. Many home growers do this in the oven or in a large container in a hot water bath. It's a lot more work than CVG, which is why most home growers growing Agaricus just buy pre-made compost from a mushroom supply company. Honestly, unless you've got easy access to aged horse manure and enjoy the process, I'd suggest buying it in too.
The Field Capacity Test
This is probably the single most important thing in this entire guide. Field capacity is the maximum amount of water a substrate can hold while still allowing air to fill the spaces between particles. Too wet and you get anaerobic conditions (leading to bacterial contamination, sour smells, and wet rot). Too dry and the mycelium stalls, the surface dries out during fruiting, and your yields tank.
The test is dead simple. Grab a big handful of prepared substrate and squeeze it in your fist as hard as you can. Here's what you're looking for:
- Perfect field capacity: A few drops of water come out. maybe 3-5 drops. The substrate holds together in a clump when you open your hand but breaks apart easily when you poke it. This is what you want.
- Too wet: Water streams out freely when you squeeze. Solution: spread the substrate out on a clean surface and let it air dry for a bit, then test again. Or mix in a handful of dry vermiculite or coir.
- Too dry: Nothing comes out, and the substrate feels crumbly and doesn't hold together. Solution: mist it with clean water, mix thoroughly, wait ten minutes for absorption, then test again. Don't add loads of water at once. it's easy to overshoot.
I test field capacity obsessively. Every single batch, multiple handfuls from different parts of the mix. It takes thirty seconds and it's saved me from ruining countless tubs. When I was starting out, my substrate was consistently too dry because I was scared of overwatering. It wasn't until I actually did the squeeze test properly that my yields improved dramatically.
Pasteurisation Methods
Pasteurisation is about reducing the population of competing organisms to give your mushroom mycelium a head start, without completely sterilising the substrate. A fully sterile substrate is actually more vulnerable to recontamination because all the beneficial microorganisms that help protect against moulds have also been killed. For low-nutrition substrates like CVG and straw, pasteurisation is all you need.
The main methods I've used:
- Bucket tek (boiling water): My favourite for CVG. Pour boiling water over dry ingredients in a sealed bucket, wait 1-8 hours. The residual heat pasteurises the mix. Temperature starts high and slowly drops. This is the method I described above for CVG. Simple, no special equipment, and I've had consistent results with it for over a year now.
- Hot water bath: Best for straw and other loose substrates. Submerge substrate in water held at 65-82°C for 60-90 minutes. You need a large pot, a heat source, and a thermometer. The tricky bit is maintaining a consistent temperature. I find using the hob on its lowest setting with occasional adjustments works, but it's more hands-on than bucket tek.
- Cold water lime bath: Dissolve hydrated lime (calcium hydroxide) in cold water at roughly 15g per litre. Submerge substrate for 12-24 hours. The high pH (around 12-13) kills most contaminants. This uses no energy and works overnight. The downside is you need to handle lime carefully. it's caustic and will irritate skin and eyes. Wear gloves. I use this method mainly in summer when heating a massive pot of water is unappealing.
- Oven pasteurisation: Spread substrate in oven trays, cover with foil, and hold at 75-80°C for 2 hours. Works well for small batches but uses a lot of energy and heats your kitchen up something fierce. I used this method when I first started because I didn't have a large enough pot. it works, but it's not my first choice.
Whichever method you choose, the golden rule is: let the substrate cool completely to below 27°C before mixing with spawn. Hot substrate will kill your mycelium. I've been impatient exactly once. mixed spawn into substrate that was still about 35°C. and lost the entire batch. Now I always use a kitchen thermometer to check.
Matching Substrate to Species
Here's a quick reference for the most common species and what they grow best on:
- Oyster mushrooms (Pleurotus spp.). Straw, CVG, hardwood sawdust. Oysters are incredibly versatile and will grow on almost anything. Straw gives the best yields in my experience.
- Shiitake (Lentinula edodes). Supplemented hardwood sawdust, or hardwood logs for outdoor growing. Won't do well on CVG alone.
- Lion's mane (Hericium erinaceus). Supplemented hardwood sawdust is best. Will grow on CVG but yields are noticeably lower.
- King oyster (Pleurotus eryngii). Supplemented hardwood sawdust or CVG. I've had good results with both, though sawdust blocks produce larger individual mushrooms.
- Button/portobello (Agaricus bisporus). Composted manure substrate. These really don't work well on anything else.
- Maitake/hen of the woods (Grifola frondosa). Supplemented hardwood sawdust. Slow grower, requires patience.
Common Mistakes
I've made all of these so you don't have to:
- Not testing field capacity. Every single batch. No exceptions. I got lazy once and ended up with a sopping wet tub that went bacterial within a week.
- Using garden centre coir with added trichoderma. Check the label. Some brands market trichoderma as a beneficial additive for plants. It's a death sentence for mushroom grows. Look for plain, unfertilised coco coir. reptile coir bricks are usually the safest bet.
- Mixing spawn into hot substrate. I mentioned this above but it bears repeating. Below 27°C. Use a thermometer. Don't trust your hand. your hand is a terrible thermometer.
- Skipping pasteurisation entirely. I tried this once with CVG because someone online said "coir is naturally contamination-resistant." It is more resistant than some substrates, sure, but I still got trichoderma on my second flush. Just pasteurise it. bucket tek takes five minutes of actual effort.
- Using the wrong substrate for the species. Growing shiitake on plain CVG will give you disappointing, rubbish results. Match your substrate to your species. the list above will sort you out.
Once your substrate is prepared, the next step is spawning to bulk in your monotub. And if you're seeing green or grey patches after colonisation, head over to our guide on common contamination signs to figure out what's gone wrong.
Frequently Asked Questions
Can I reuse substrate from a previous grow?
Technically yes, but I wouldn't recommend it for indoor grows. Spent substrate has already had most of its nutrition stripped out, so yields will be rubbish. It's also more likely to harbour contaminants from the previous flush. What I do instead is chuck spent substrate into my outdoor mushroom bed. it sometimes produces a bonus flush or two out there where conditions are less controlled. For indoor monotubs, always start with fresh substrate.
Do I need to pasteurise coco coir if it comes in a sealed brick?
Yes, absolutely. Those compressed coco coir bricks aren't sterile, even though they look clean. They've been stored in warehouses, handled by who knows how many people, and can harbour trichoderma spores and bacteria. The bucket tek method (pouring boiling water over it) is technically pasteurisation, and it's the minimum you should do. I've had contamination from unpasteurised coir. it's not worth the risk to skip this step.
What ratio of spawn to substrate should I use?
I typically go with a 1:2 to 1:4 spawn-to-substrate ratio by volume. So for every litre of colonised grain, I'll mix in 2-4 litres of hydrated bulk substrate. A higher spawn ratio (1:2) colonises faster and is more resistant to contamination, which is great for beginners. A lower ratio (1:4) stretches your spawn further but takes longer to colonise and leaves more room for contaminants. For your first few grows, stick with 1:2 or 1:3. speed is your friend.